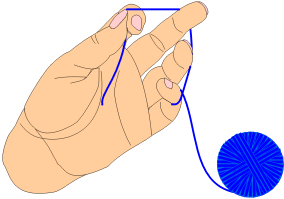
These instructions are for right handed
tatting.
If you are left handed and want to see left handed instructions,
click here.
To make the chains used to join motifs in tatting you need a shuttle loaded with thread and a ball of thread. In my diagrams I have used two different colors to make the stitches easier to see.
Hold the ball of thread on your left hand and begin to wrap it around as if shuttle tatting. Instead of bringing it back up to your thumb, wrap once around your pinkie. The pinkie will control the tension. Use your ring finger or the middle one or even the pinkie and ring fingers together if it is more comfortable. The finger used is not the important thing, controlling the tension is.

Now, alongside the ball thread, place the shuttle thread in between your thumb and index finger. Play out a little shuttle thread and start your first half of a stitch. Keep the ball thread tense so it doesn't slip off your hand.
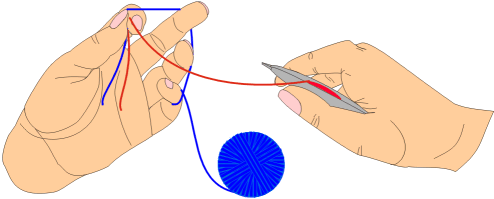
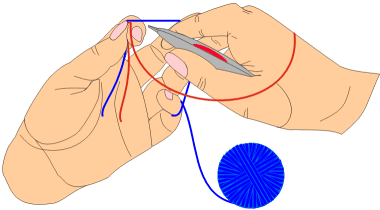
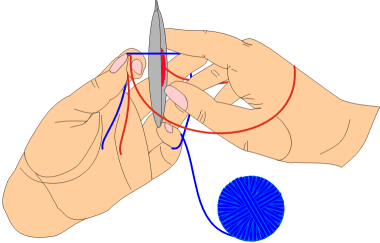
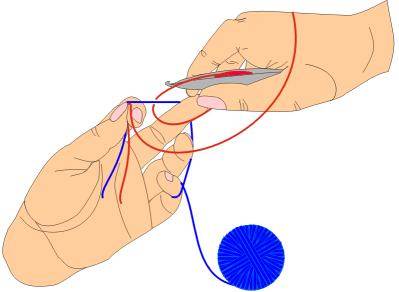
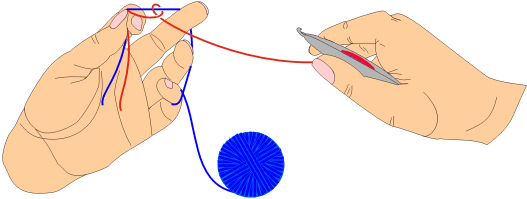
Pass the shuttle under the ball thread, then back over and through the loop over the back of your right hand. Again this is just like the first half of a stitch in a ring. Now pull the excess thread up with your shuttle hand and slightly loosen the tension on the ball thread.
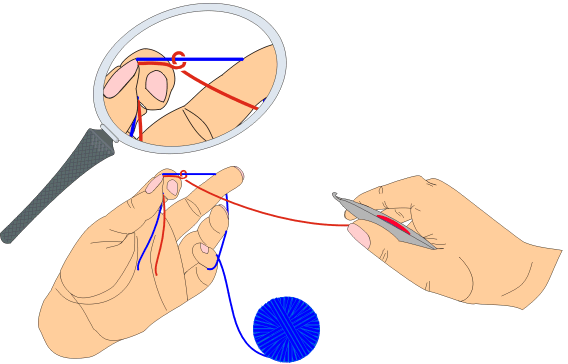
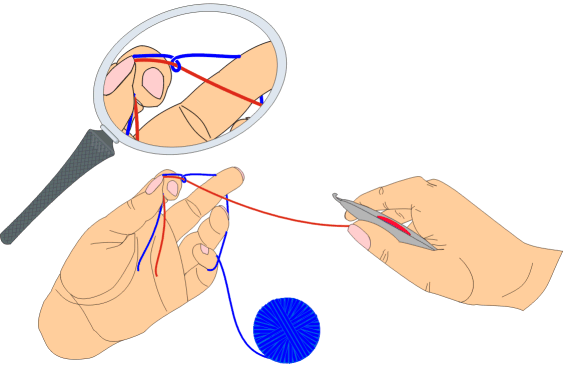
The loop will "jump" to the ball thread as you pull up the excess shuttle thread. This is the knot transfer. The knot transfer lets the stitches slide on the shuttle thread.
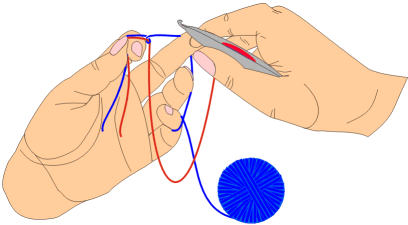
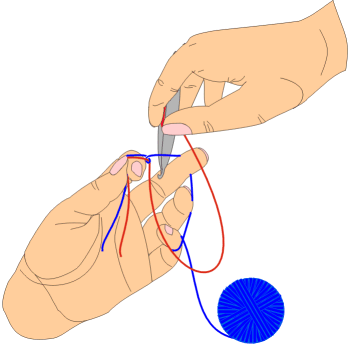
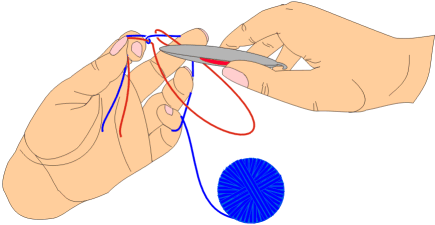
Now start the second half of the stitch by passing the shuttle over the ball thread.
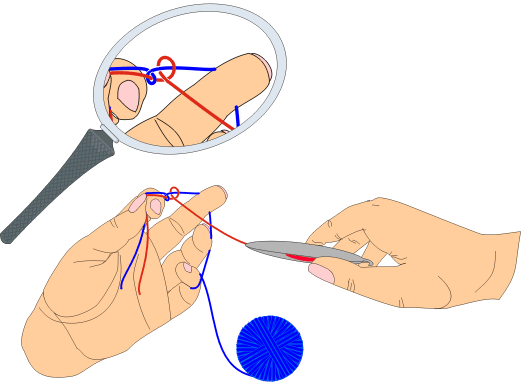
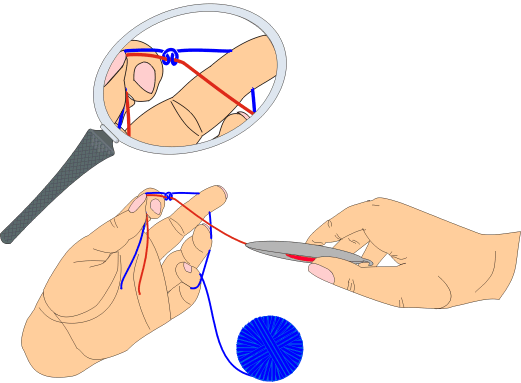
As you pull up the excess thread, the knot will again "jump" to the ball thread. Once again the knot transfers.
You have completed a sitch of chaining.
I hope this has helped you learn to tat chains. If you find any glaring errors, please let me know.
-Carrie
Using CorelDraw!(tm) and Corel Photo-Paint(tm) I drew the pictures from scans of my own hands and wrote the text myself. I hold all rights to this page except the arrows and magnifying glass which are CorelDraw!(tm) clipart.
-Carrie Carlson