These instructions are for right handed
tatting.
If you are left handed and want to see left handed instructions,
click here.
Make a ring with picots and close it.
Start another ring. At the point in the pattern where the join is pull the working thread up through the picot on the finished ring. Use the hook on the shuttle or a small crochet hook.
Pull the working thread up just enough to pass the shuttle through.
As you pull through the shuttle thread, pull the working thread also, not tight, just snug. The stitches have to be able to slide along the working thread and allow you to close the ring when finished.
The closeup in the magnifying glass shows the working thread and the shuttle thread both remain on the outside of the picot when the stich is snug.
Now make a complete the stitch, going first under then over the working thread exactly like a regular stitch.
This stitch will be the first stitch counted in the next part of the pattern.
You have completed a join. Continue the pattern of the ring you are working. Close as you normally would.
Here are two finished rings with joins.

Back
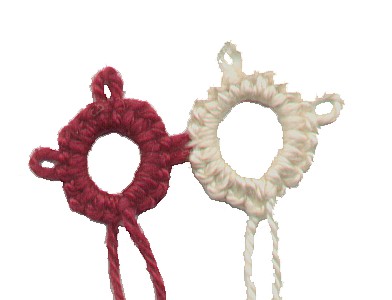
Front
I hope this has helped you learn to join your rings together.
If you find any glaring errors, please let me know.
-Carrie
or
Using CorelDraw!(tm) and Corel Photo-Paint(tm) I drew the pictures from scans of my own hands and wrote the text myself. I hold all rights to this page except the arrows and magnifying glass which are CorelDraw!(tm) clipart.
-Carrie Carlson